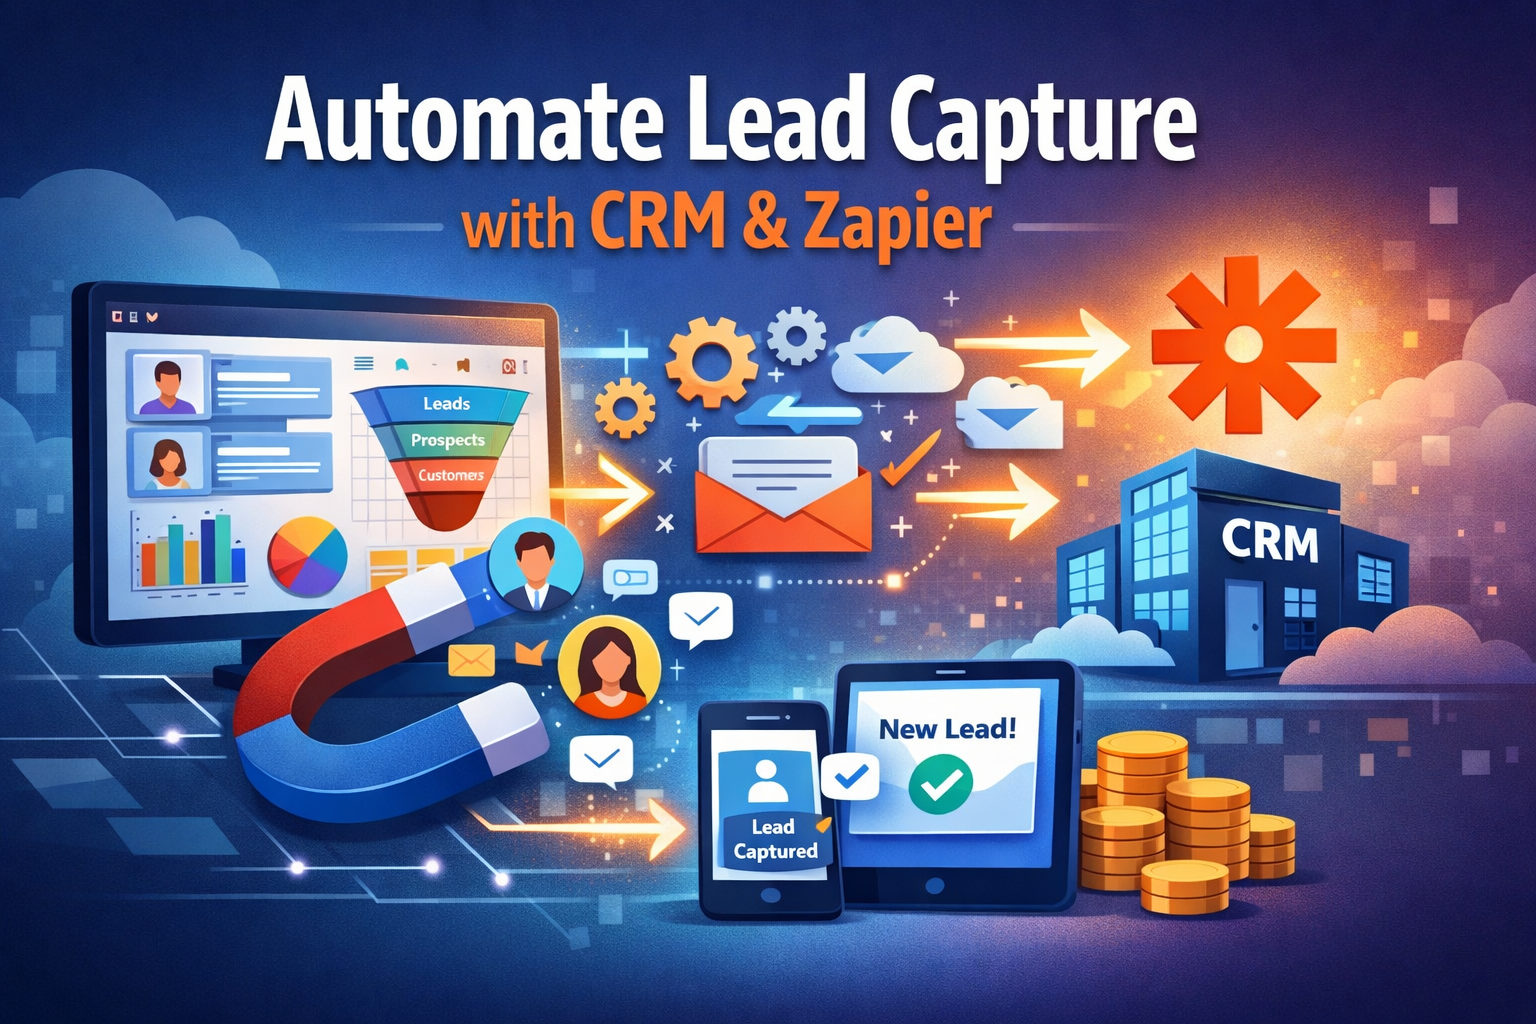
How to Automate Lead Capture and CRM Entry with Zapier (Step by Step)
Zapier automates lead capture by connecting your contact form or Facebook Lead Ads to HubSpot CRM the moment someone submits. It deduplicates contacts, maps all fields, and sends an instant sales alert to your inbox. Setup takes 2 hours and costs $19.99/mo on Zapier Professional.
Time to build
2 hours
Weekly savings
3 hours/week
Setup cost
$19.99/mo
Read time
9 min read
The Blueprint Summary
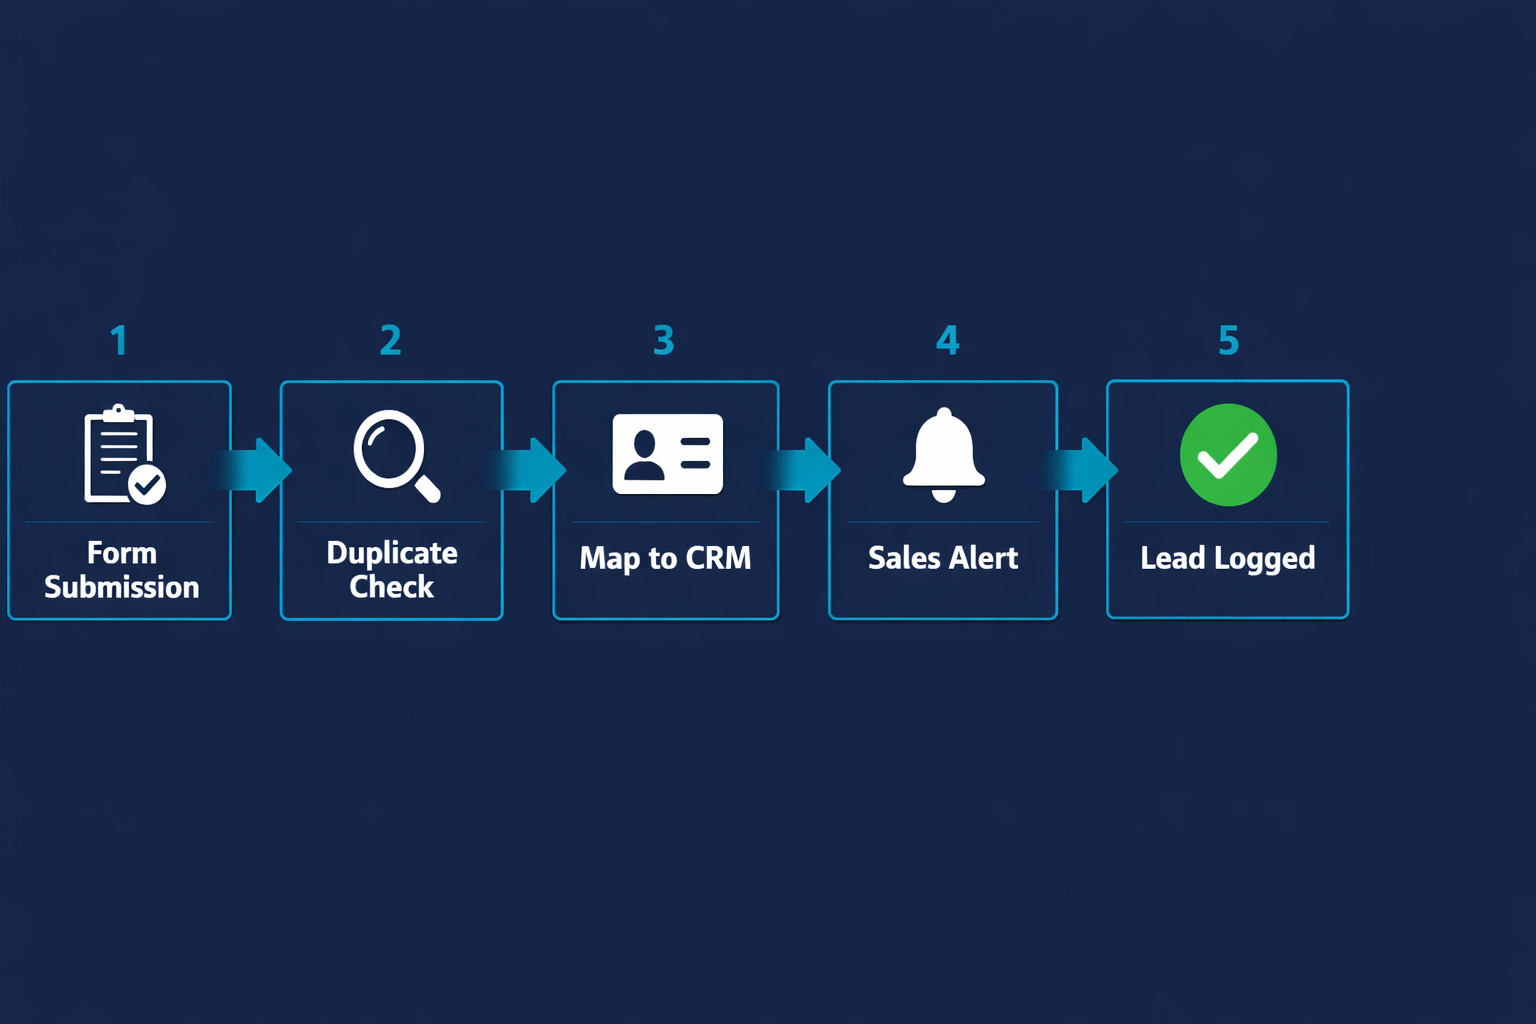
Build a 5-step Zapier workflow that captures every new lead from your form or Facebook Lead Ads, deduplicates them in HubSpot, maps all fields including a Capture Source tag, and fires an instant alert to your sales inbox, all in under 60 seconds from submission.
Every lead hits your CRM in under 60 seconds, tagged and ready to follow up, so you stop losing deals to slow manual logging.
Key Takeaways
- ✓ HubSpot CRM is completely free, the only paid tool required is Zapier Professional at $19.99/mo billed annually
- ✓ The duplicate check in Step 2 is the difference between a clean CRM and one full of ghost records you will spend hours fixing
- ✓ This workflow supports Typeform, Google Forms, Jotform, Tally, Facebook Lead Ads, and Unbounce as the trigger source
- ✓ A Capture Source custom property on every contact is the single most important attribution field you will ever set up
- ✓ Never test with Zapier sample data, always submit a real form entry to catch field mapping gaps before they hit a live lead
Before You Start
- → A Zapier account, free to create at zapier.com, you will upgrade to Professional at $19.99/mo when you add the second step
- → A HubSpot Free account at hubspot.com, no credit card required
- → A live lead capture form in Typeform, Google Forms, Jotform, or Tally, or an active Facebook Lead Ads campaign
- → A custom HubSpot Contact property called Capture Source created in HubSpot Settings under Properties before you start Step 3
- → A Gmail inbox or Slack channel designated as your lead alert destination
Email this guide to yourself
Get the link in your inbox so you can implement it when you have time.
Check your inbox — the link is on its way.
No spam. Unsubscribe anytime.
What manual lead logging is actually costing you
Every time you receive a form notification and copy the name, email, and phone number into a CRM by hand, you spend 2 to 5 minutes on a task a $19.99/mo tool handles in under 60 seconds.
At 20 leads per week that is between 40 and 100 minutes of your week gone to copy-pasting.
Over a full year that is between 35 and 87 hours of manual data entry.
At $30/hr in billable or productive time, that is between $1,050 and $2,610 in lost value per year to avoid a $240/yr subscription.
The time cost is real, but the conversion cost is worse.
Research consistently shows that contacting a new lead within 5 minutes of form submission produces dramatically higher conversion rates than waiting 30 minutes or more.
Manual logging creates dangerous gaps: you see the notification, you mean to handle it, something interrupts, and by the time you open the CRM the lead has already spoken to your competitor.
What this workflow does
This guide builds a 5-step Zapier workflow that captures every new form submission or Facebook Lead Ad the moment it arrives.
Step 2 runs a duplicate check before creating anything, so the same person submitting twice never generates a second contact record in your CRM.
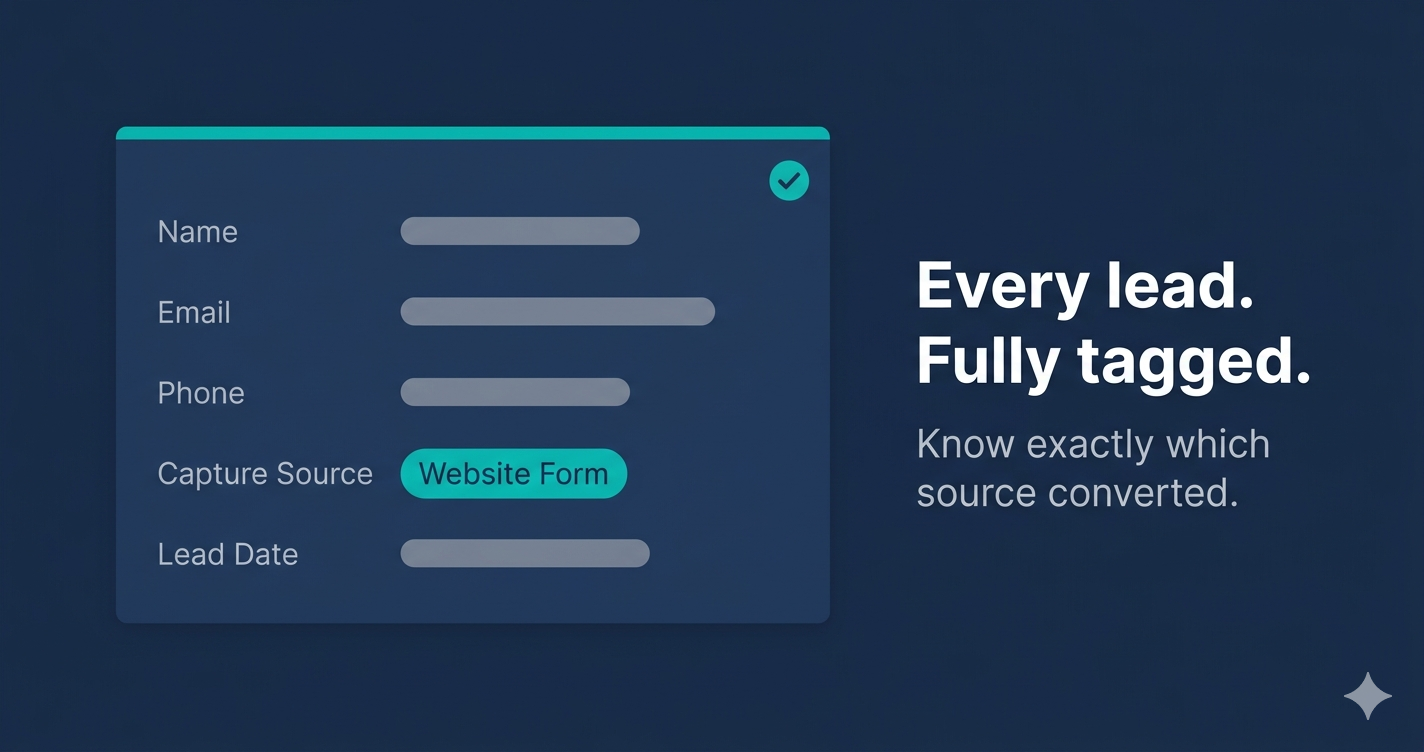
Step 3 maps every field to the correct HubSpot property including a custom Capture Source tag that records exactly which form or campaign each lead came from.
Step 4 fires an instant internal alert to your sales inbox or Slack so follow-up can start within minutes of submission.
Once live, no lead passes through without being logged, tagged, and escalated, and you never touch it manually.
Why Zapier and HubSpot for this workflow
Zapier is used here because it requires zero code, connects to every major form tool and CRM on the market, and has a step-by-step builder that a non-technical person can complete in a single session.
HubSpot Free is the CRM destination because it is the only major CRM that gives you unlimited contacts, custom properties, a deal pipeline, and full Zapier integration at zero cost with no credit card required.
If you already use Pipedrive, Salesforce, or Zoho CRM, the steps in this guide translate directly to your platform with only the field names changing.
The Capture Source field and why it matters
Most businesses skip attribution fields when setting up their CRM and spend months unable to tell which campaigns are generating leads worth closing.
The Capture Source property is a custom HubSpot text field you create before building the Zap.
You hard-type your form or campaign name as a fixed value inside the Zap mapping so every contact logged from that source carries an identical, searchable tag.
With this in place you can filter your entire HubSpot Contacts list by source in one click and see which forms and campaigns produce leads that convert versus leads that go cold.
Which lead source to use as your trigger
Typeform is the most reliable Zapier trigger for website forms because it fires in real time the moment a submission is completed.
Google Forms works but uses polling and can introduce delays of up to 15 minutes on Zapier Professional, making it a weaker option for time-sensitive follow-up.
Facebook Lead Ads connects directly to Zapier without a third-party form tool, making it the fastest setup path for paid social campaigns.
If your leads currently arrive via WhatsApp messages or email replies, add a Tally or Typeform intake form link as the first step in your lead process before building this automation, because Zapier needs a structured form submission to map fields reliably.
When NOT to build this
Do not build this if you receive fewer than 5 leads per week.
At very low volume the $19.99/mo Zapier Professional cost outweighs the time it saves, and a simple manual process is more appropriate until your lead flow grows.
Do not build this if your HubSpot custom properties are not yet finalised.
Every time you rename a HubSpot property after the Zap is live, the field mapping silently breaks and contacts come in with blank fields until you manually fix the Zap.
Set up your full property structure in HubSpot before you build a single step in Zapier.
What good looks like when this is running
A lead submits your form and within 60 seconds a new contact appears in HubSpot with name, email, phone, Capture Source, and Lead Date all correctly populated.
Your Zapier task history shows every step as green for every submission with no errors or skipped steps.
Your internal alert lands in Gmail or Slack immediately with the correct mapped data so follow-up can begin before the lead has closed the form tab.
Your HubSpot Contacts list has zero duplicate records because the Find Contact check runs before anything is written.
You can filter by Capture Source at any time and see a clean breakdown of which sources are sending leads that convert.
Implementation Steps
Connect your lead source as the Zapier trigger
Connect your form or Facebook Lead Ads account to Zapier so the workflow fires the moment each new lead submits.
- • Open Zapier, click Create Zap, and search for your lead source app (Typeform, Google Forms, Facebook Lead Ads, Jotform, or Tally)
- • Select the trigger event: New Entry, New Submission, or New Lead depending on the app
- • Click Connect and authorise your form account or Facebook Business Manager
- • Load a sample submission and confirm Zapier receives the name, email, and phone fields
- • Rename the Zap to Lead Capture to HubSpot in the top-left name field
- • Click Continue to proceed to your first action step
Free to connect. Zapier Professional at $19.99/mo billed annually is required when you add the second action step. Zapier prompts the upgrade automatically.
The Catch
Facebook Lead Ads requires a live published ad campaign with at least one real submission to generate usable sample data in Zapier. If your campaign is not yet active, use Typeform or Tally as the trigger first and swap the source later. Auto-generated Facebook sample data does not catch field mapping errors before they hit real leads.
Run a duplicate check before creating any contact record
Search HubSpot for the lead's email address before writing anything, so the same person submitting twice never generates two contact records.
- • Click the + icon after the trigger to add a new action step
- • Search for HubSpot and select Find Contact
- • Click Connect and authorise your HubSpot account using Super Admin credentials
- • Set Search Field to Email and map it to the email output from your trigger step
- • Scroll to the bottom of the step settings and enable Create HubSpot Contact if not found
- • Test this step using an email address that does not already exist in your HubSpot Contacts
HubSpot Free. No paid plan required for Find Contact or contact creation via Zapier. This step costs nothing beyond your Zapier task allocation.
The Catch
If you skip this step and go directly to Create Contact, every returning visitor who fills in your form a second time generates a duplicate record. You end up with the same person logged multiple times with split conversation history, broken lead scoring, and no way to tell which record is current without a manual audit.
Ready to get started with Zapier?
Connect 8,000+ apps and kill manual data entry forever.
Try Zapier Free →Map all lead fields to the correct HubSpot contact properties
Configure the field mapping so every piece of data from the form lands in the right HubSpot property with no blank or mismatched fields.
- • Add a new action after Find Contact: HubSpot Update Contact
- • Map Email to the email field from your trigger step output
- • Map First Name and Last Name to their respective HubSpot fields, using Zapier Formatter to split a single Full Name field if your form collects it as one string
- • Map Phone Number to the HubSpot phone property
- • Map your custom Capture Source property to the exact name of your form or campaign typed in as a fixed text value
- • Map a custom Lead Date property to the submission timestamp from the trigger output
HubSpot Free supports unlimited custom contact properties. Create Capture Source and Lead Date as text and date properties respectively in HubSpot Settings under Properties before building this step.
The Catch
HubSpot built-in Lead Source uses a fixed dropdown that you cannot extend on the free plan. Create a separate custom text property called Capture Source and hard-type your form or campaign name as a fixed value in the Zap mapping. Without this, every contact has a blank source field and you lose all attribution data.
Send an instant internal alert when each new lead is logged
Fire a notification to your sales inbox or Slack the moment a new contact lands in HubSpot so follow-up starts in minutes, not hours.
- • Add a new action step after HubSpot Update Contact
- • Select Gmail Send Email or Slack Send Message and connect your account
- • Set the recipient to your sales inbox or a dedicated leads-only Slack channel
- • Build the message body: New lead from [Capture Source]: [First Name] [Last Name] | [Email] | [Phone]
- • Map each field in the message body from the HubSpot Update Contact step output
- • Set the subject line or Slack header: New lead captured [Date]
Gmail Free and Slack Free both support outgoing Zap messages. This step uses one Zapier task per Zap run, included in your Professional plan.
The Catch
Do not route this alert to your entire team. Lead alert fatigue is real: when everyone sees every notification, nobody takes ownership. Route it to one inbox or one dedicated Slack channel and assign one named person to own first contact.
Test with a real form submission and turn the Zap on
Submit a live test entry through your actual published form and confirm every step fires correctly before any genuine prospect goes through the workflow.
- • Submit a test entry using your own name and email through your actual published live form
- • Open Zapier task history and confirm all steps show green with no errors or skipped steps
- • Open HubSpot Contacts and verify the test record was created with all fields populated correctly
- • Confirm the Capture Source field shows the correct form or campaign name you mapped
- • Check that the Gmail or Slack alert arrived with all lead data correctly mapped
- • Delete the test contact from HubSpot to keep your CRM clean, then set the Zap status to On
Free. Test runs in Zapier do not count toward your monthly task limit.
The Catch
Never use Zapier built-in sample data as your final test. It is auto-generated and does not replicate your actual form fields or optional field behaviour. Submit through your live published form with every field filled, including optional ones, to catch every mapping gap before a real lead exposes it.
Tools That Can Run This
This guide uses Zapier. Here is how alternatives compare.
| Tool | Plan Needed | Monthly Cost | Best For | The Catch |
|---|---|---|---|---|
| Zapier | Professional | $19.99 | Non-technical users who need fast setup and the widest form and CRM integration library | 750 tasks/mo on Professional billed annually. Each action step per Zap run counts as one task. Above 500 leads/mo you will need to upgrade to a higher task tier. |
| Make | Core | $10.59 | Higher lead volumes or multi-branch routing logic at a lower cost per operation | Steeper learning curve than Zapier. Expect 2 to 3 times the setup time for the same workflow on your first build. |
| n8n | Self-hosted (free) or Cloud Starter at $20/mo | $0 to $20 | Technical users who want unlimited task runs and full control over data routing | Self-hosted requires a VPS and server management skills. Not a practical first tool for non-technical users who need to go live fast. |
Implementation notes for global businesses
🌍 Africa
All tools in this stack work across Africa. Zapier Professional requires an international Visa or Mastercard for billing. Chipper Cash and Geegpay both issue free virtual Visa cards that work with Zapier billing. HubSpot Free requires no card at all. Facebook Lead Ads is one of the most effective paid lead sources across the continent. WhatsApp leads are common but WhatsApp has no native Zapier trigger: add a Tally or Typeform intake form link to your WhatsApp Business profile and broadcasts so those leads enter this workflow as structured form submissions.
🌍 Latin America
Zapier, HubSpot, Typeform, and Facebook Lead Ads all work without restriction across Latin America. Zapier billing requires a Visa or Mastercard. Pix and MercadoPago are not accepted by Zapier or HubSpot directly. A Wise or Payoneer virtual card works for Zapier Professional billing if your primary card is local.
🌍 Southeast Asia
All tools work across Southeast Asia. Zapier payment processes with any Visa or Mastercard issued by local banks. Line OA forms, widely used in Thailand and Taiwan, do not have a native Zapier trigger. Use Tally or Typeform as a structured intake bridge linked from your Line campaigns and feed those submissions into this workflow as the trigger source.
Common Mistakes
Skipping the duplicate check and going straight to Create Contact
Add a HubSpot Find Contact step before Update Contact and enable Create if not found. This single step is the difference between a clean CRM and one you deduplicate manually every quarter.
Leaving Capture Source unmapped or mapping it to HubSpot built-in Lead Source
Create a custom HubSpot text property called Capture Source before building Step 3, then hard-type the form or campaign name as a fixed value in the Zap mapping. Without this, you have zero attribution data and no way to identify which sources are generating leads worth closing.
Testing with Zapier auto-generated sample data instead of a real form submission
Submit a real entry through your live published form using your own email address. Sample data does not replicate optional fields, conditional logic, or multi-select behaviour. Real submission testing is the only way to catch mapping gaps before they hit actual leads.
Sending the lead alert to the entire team instead of one designated owner
Route the alert to one inbox or one dedicated Slack channel with a single named person responsible for first contact. Broad alerts create diffusion of responsibility: everyone sees it, nobody acts, the lead goes cold.
Do not want to build this yourself?
The Zapier Automation Recipe Pack includes a pre-built lead capture Zap. Import it, connect your accounts, and it is live in under 20 minutes.